

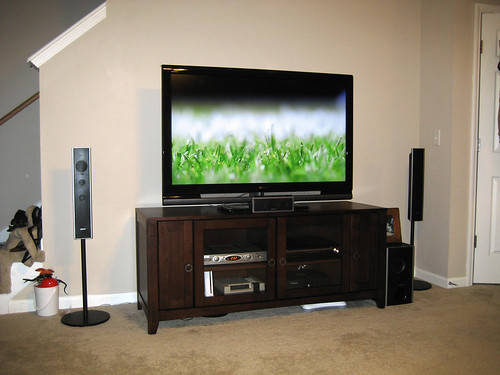
Recently I bought a Sony Bravia 32″ LCD TV. It supports connectivity to Internet over the wi-fi and ethernet cable. I was happy seeing its specifucations and it was written ‘internet ready’. Later I found the fine print – I have to buy a dongle from Sony to get the Wi-Fi working. The shop at Gulshan asked a price of BDT 10,000 for the dongle. It’s too much for me – $250 for a dongle!
I googled and found it only support the dongle made by Sony. I am using a Wi-Fi router at my home – just to connect to internet – all my devices – Android phone, iPad, MacBook and Laptops connect to internet through this wi-fi router. Then why not TV? Yes, I have to do it. So just followed the simple process:
- Bought another wi-fi router from the market. That time a deal was going on from Ajkerdeal.com, and I got the TP-LINK wi-fi router for BDT 2,200 (less than $26.).
- Connected that wi-fi router to Sony Bravia TV.
- Configured the router as wireless bridge to my previous router.
- And its working. Now I can access internet from my Sony Bravia using the same internet connection I am using for other devices. Not only that I can play music and videos from other devices (iPad, Laptops) on the big screen of Sony Bravia. If you have a Sony Bravia, and it’s ‘internet ready’, you can do this too.


can you present the sequence with pictures in step by step manner?
I understand that you are looking for a visual step-by-step guide on how to connect your Sony BRAVIA to the internet without purchasing the dongle from Sony. While I cannot provide pictures directly in this text-based platform, I can guide you through the process in a detailed manner.
1. First, ensure that your Sony BRAVIA TV has built-in Wi-Fi or an Ethernet port. If it has a built-in Wi-Fi, you won’t need any additional hardware. If not, you will need an Ethernet cable to connect your TV to the internet router.
2. Turn on your Sony BRAVIA TV and press the “Home” button on your remote control.
3. Using the arrow keys on the remote, navigate to the “Settings” option and press the “Enter” button.
4. In the “Settings” menu, locate and select the “Network” option. This will open the network settings menu.
5. In the network settings menu, choose the “Network Setup” option and press “Enter”.
6. Depending on your Sony BRAVIA TV’s model and software version, you may have different options for network connection. Select the appropriate option that suits your connection type, such as “Wireless” or “Wired”.
7. If you choose a wireless connection, your TV will scan for available Wi-Fi networks. Select your home Wi-Fi network from the list and enter the password if prompted.
8. If you choose a wired connection, connect one end of the Ethernet cable to your TV’s Ethernet port and the other end to your internet router.
9. After selecting your desired connection type and completing the necessary steps, your Sony BRAVIA TV should establish a connection to the internet.
Please note that the exact steps may vary slightly depending on your Sony BRAVIA TV’s model and software version. It’s always a good idea to consult the TV’s user manual or visit the Sony support website for specific instructions related to your model.
I hope this explanation helps you in successfully connecting your Sony BRAVIA TV to the internet.
I have a Sony Dongle you are talking about here. But I am unable to share anything with the TV. I faced no problems at all to connect my TV with other devices using WIFI Direct (iPad as well as my PC) however I am unaware of how to share them with my Sony TV. Kindly suggest